Friday, October 28, 2011

In the Craft Room

Oh that sounds so organized but in reality it is completely the opposite plus my craft room is predominantly the computer room and place for storage of random stuff unfortunately.  But what I really mean is that I thought I would pop a wee post up about what has been happening on the crafty front round here.
Mainly of late I have been knitting.  I have got two things here that are recently off the needles but one is a gift and the other is blocking so instead of posting proper pics I will just show this until I am ready to do FO posts on these ones.
So what is on my needles now?  Another test knit, here is a sneaking WIP pic.
The main problem I have had lately is that I have a whole heap of sewing I HAVE to get done (I promised someone nappies weeks ago) and I have no motivation to drag out the machine and get stuck into it.  But yesterday this arrived in the mail

Followed by this today.
Well hello there sewing mojo, now I just need some kid free time to get on with it :-)

Tuesday, October 25, 2011

Giveaway Results

First of all a huge thanks to everyone who read my Designer round-up ramblings and left comments, I have loved looking up patterns people mentioned and even discovered a couple of new designers, woohoo.

Anyway the winner of the free pattern, as chosen by random.org, is......... number 5.

The lucky recipient is Natalie who requested Christine's Daisy May pattern.
via
Congratulations Natalie.  Can you please let me know your contact details so I can gift the pattern to you :-)

Monday, October 24, 2011

Tutorial: Simple Circular Skirt or Ballet Skirt

This tutorial has been a long time coming, sorry to those who expressed an interest in it months ago, but better late than never right?
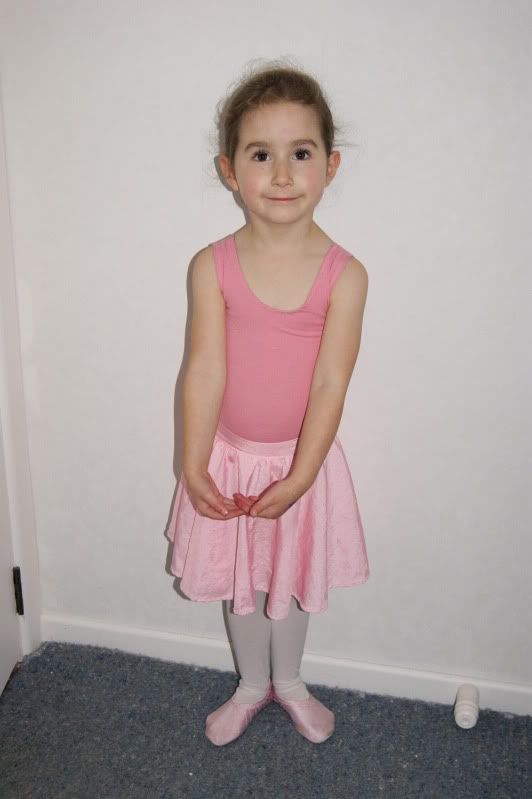
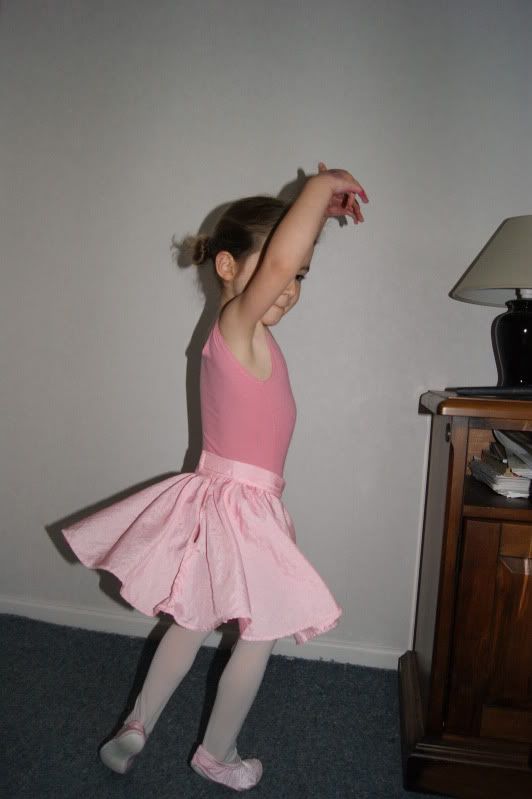
Way back in march I made a ballet outfit for a special wee girl for her birthday and blogged about it here.  Miss K loved it and here some photos of her that her Mum has kindly told me I can share :-)

So this whole Blogtober thing got me to thinking that I should finally get around to writing up this tutorial.  First of all some disclaimers.  This is the first tutorial I have written so I will do my best but no guarantees.  Secondly like I said I made this back in March so I will try to remember everything as accurately as possible.  Thirdly even with my science geek background this will take more of a "roll with it" than a "rigorously scientific" approach :-)

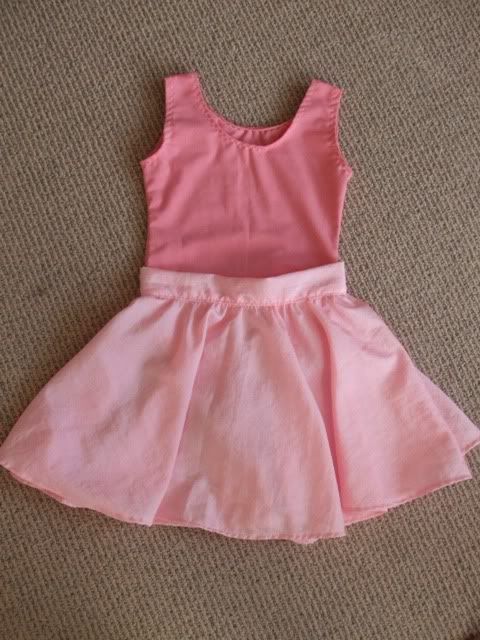
This tutorial is for a simple circular skirt on a waistband.  Here I have made it as a wee 'ballet' skirt but you could easily make it for any kind of dress up or even as a simple skirt.  The size is completely tailored to the measurements of the child so it is completely versatile from baby to adult if necessary.
Materials required:
Fabric - This sort can be made in most fabrics however fabrics with a loose weave such as chiffon may 'drop' to give an uneven hem over time.  Here I used a taffeta lining.  How much you need with depend on the measurements of the finished skirt.  It's probably best to read through the tutorial and work backwards to work it out from there.
Tape Measure
Thread
Velcro (hook and loop) or whatever kind of fastening you wish to use.
Interfacing for waistband if wanted.

1. Measure the child (or adult) the skirt is for.  You will require a waist measurement (taken over whatever layers the skirt will be worn over) and desired finished length of the skirt from wist to hem.

2. Fold the fabric in half salvage to salvage, then fold it back along the length of the fabric as shown below.  You can adjust these folds to avoid fabric wastage later if desired.
3. At this stage you need to decide if you want the skirt gathered at the waistband or not.  If you do then you need to decide how much.  From memory I had this skirt slightly gathered so took the waist measurement and multiplied it by about 1.25, for a full gather I would multiply by 1.5 to 1.75, this will be your 'skirt top measurement'.  (NOTE:  If you are using a heavy cotton or any heavier fabric I wouldn't gather too much as there is a lot of fullness in a full circle of fabric anyway and it can get quite heavy).  If you don't want gathers simply use the waist measurement here.  Divide the 'skirt top measurement' by 4 and place a tape measure on the fabric in a rough circular shape to achieve this measurement as shown below.

4. Mark the ends of the tape measure on the fabric and measure the distance from the corner to this point.
5. Add this number to the total desired length of the skirt plus approx 1-2cm for a hem.  Take this new total length and measuring from the corner cut a quarter circle from the fabric.

6.  Now repeat the quarter circle cut from the corner with the measurement taken in step 4 to form the waist.  That's the skirt part cut out :-)
7.  Cut a strip of fabric for the waistband the length of which will be the waist measurement plus approx 8cm for overlap and the width twice the width of the desired finished waistband plus 2cm.  If you want to interface the waistband for support apply the interfacing to one half (lengthwise) now.
8.  Make a slit in the back of the skirt down from the waist approx 8-10cm (or longer if it is for an adult, remember this will allow the skirt to be puled up over the hips) and finish the raw edges of this slip, I overlock but this isn't necessary.  Then if gathering run a long gathering thread around the waist of the skirt and gather to finished waist measurement.

9. Pin waistband to waist edge of skirt folding the finished raw edge of the back slit towards the inside of the skirt.  The waistband is pinned with the right side of the waistband fabric to the wrong side of the skirt, so pin it to the inside of the skirt.  The waistband will have a slight overlap (1-1.5cm, your seam width roughly) at one end and a large overhang at the other end of the waist.
10.  Finish the raw edges of the waistband.  The picture here actually shows the skirt inside out, sorry it's hard to tell the right and wring side of the fabric I used.
11. Fold the waistband in half the stitch remembering to fold up the seam allowance of the free edge to the outside as shown.  Stitch the ends of the waistband.
12.  Turn waistband in the right way and pin in place on the right side of the skirt turning under the seam allowance as you go.
13.  Carefully topstitch close to the bottom of the waistband.  Then stitch down the finished edges of the back slit as shown below.
14.  Finish raw edge of hem, turn up and stitch.
15. Apply velcro to waistband and you are all done :-)
Please let me know if you have any questions about this tutorial.  If you want anything clarified please ask, and if you find this useful I would love to see pics of your finished skirts :-)  Enjoy and happy sewing.

Sunday, October 23, 2011

Al Fresco Dining

Even though it is a long weekend here by some miracle the weather hasn't been too bad.  Yesterday (and yes I do know this is a day late but DP was busy on the computer last night) we dragged out and dusted off the outdoor furniture for the first time this season and Miss M enjoyed her first meal al fresco.  Both kids thought it was fantastic and the bubble machine being turned on after dinner made it even better.
A couple of pretty terrible pics :-)

 Afterwards we even got to enjoy our bedtime stories and snacks with the sun still streaming into the lounge.
Roll on summer!

Friday, October 21, 2011

Numbers

Today Mr A found an old calculator of mine and we introduced him to doing simple addition with it.  He would happily type in "2 + 2" and then count on my fingers to work out the answer was 4, then stare in wonder as the calculator "got it right" over and over again.

Not only did this simple game show us that Mr A was more fluent with numbers than we thought but he was learning a lot about simple maths.  He even recognized that you could tip win different numbers but end up with the same answer like 4 + 3 and 5 + 2.  I think it may be time for me to make up a wee maths kit for Mr A with 10 each of 10 different objects so he can explore and extend these concepts as I think a lot of the next few days will be spent with calculator in hand.

Thursday, October 20, 2011

Designer Roundup: The Giveaway

To complete my wee designer roundup series and to celebrate Blogtober I have decided to have a giveaway :-)  In order to spread the love for the designers I have mentioned I will gift one person any pattern of your choice by one of the designers I have featured (it doesn't have to be one of the patterns I have featured).  All you need to do to enter is leave a comment here letting me know which pattern you would like to win and your Ravelry name (or email address if you aren't a Ravelry member).  If you don't knit but like the look of a pattern enter anyway, if you win you can always twist someone's arm to knit for you :-)
Finally since I love discovering new patterns and designers feel free to add your current favorite pattern or designer to your comment as well.
I will close this off and do a draw using random.org at 8pm (NZ time) on Tues 25th October so check back Tuesday night for the results.

And just because this posts needs a pic here are my fur babies

Wednesday, October 19, 2011

Designer Roundup Part 3: For Grown Ups

Today I will conclude my wee designer series with some of my favourite designers of clothing and accessories for grown-ups. 
Anyone who knows me at all will not be at all surprised that the top of the list here for me is Ysolda Teague, in fact I have already blogged about my love of her designs here.  The latest offering from Ysolda is her absolutely fabulous and much anticipated book Little Red In The City.  Yes this book contains some lovley knitting patterns but it also contains a plethora of really useful information.  You know how so often books are jam packed with information that you feel should be useful but you never really use?  Well this book isn't like that at all.  I pre-ordered my copy of Little Red and waiting almost patiently for it to arrive in the post.  I am sad to say I haven't had as much time to read it as I would have liked but it goes through everything you need to know about making a garment that actually fits!  You know maybe take some of the guess work out of it and avoid the weeks of knitting only to end up with something that looks like an expensive sack or you can hardly squeeze into?  There is also information on yarn choice and substitution and various knitting techniques.  I can see this becoming my 'go to' knitting reference book.  All that said we musn't forget the patterns and I have definite plans to knit Cria at some stage and probably some of the others as well.
Cria
Next up on my list is Gudrun Johnston of Shetland Trader.  Once again there are many of Gudrun's designs in my knit queue but the ones closest to the top are Laar, Shalder and Moch Cardi.  I am seriously thinking of adding her book "The Shetland Trader - Book 1" to my christmas wish list as well. Although I love the accessibility of downloaded patterns and that I can carry them all around easily in my iPad there is nothing quite like flicking through a real live book and looking at the gorgeous pictures and layout etc to make me really want to knit something :-)
Laar
Shalder
Moch Cardi
One of my most recent designer discoveries on Ravelry is the very talented young designer Lily Kate France of Joli House.  Her designs are fresh, fun and funky and I can't wait to knit Wray which would have to be my favorite so far.
Wray
Finally on this list is Hannah Fettig of Knitbot.  I love the simplicity of Hannah's designs and the drape and shape she can get from the yarn.  I recently finished one of her designs, the Whisper Cardigan, and I know I will be knitting more in the future.  In fact the book that she has just released in conjunction with Alana Dakos who I mentioned yesterday may well be on my christmas list as well.  A couple of my fav designs from Coastal Knits are Rocky Coast Cardigan by Hannah and Gnarled Oak Cardigan by Alana.
My Whisper Cardigan
Rocky Coast Cardigan
Gnarled Oak Cardigan
There are many other designers on Rav who I have discovered as well but the list is way too long and this doesn't even touch things like shawls and socks but it would go on forever.
So what is at the top of your "I really want to knit for me" list?  Let me know and be sure to check back tomorrow for a giveaway along this recent theme of mine.

Tuesday, October 18, 2011

Designer Roundup Part 2: For the Kids

Continuing my designer roundup today with some of my favorite pattern designers who predominantly design with children in mind.  These are by no means the biggest, most prolific or necessarily most popular designers of kid wear on Ravelry but are some of my current favorites.

First up is actually another New Zealand designer, Justine Turner of Just Jussi.  I have admired Justine's designs for a long time now, she manages to capture practical and interesting all in the same garment.  Another thing I love about Justine is that she has some fabulous boys designs as well as some classic and very feminine girls patterns.  I still think that my all time favorite pattern is the Victoria Cardigan, I have knit this twice now, once as a gift and once for Miss M and I know I will definitely knit more in the future (and that is saying something because I rarely knit a pattern more than once).  I was also lucky enough to test knit the lovely Clipper smock which I adore with it's heart shaped cable detailing, and have knitted Roaring Meg as a gift.   Another I definitely have in my "to-knit" list is the Dolly Mixture Vest, I just need to find the yarn.
Victoria for Miss M
Clipper
Roaring Meg for a gift
Dolly Mixture Vest
Another designer who seems to produce so many gorgeous patterns for both boys and girls is Elena Nodel of Anadiomena Designs.  Elena currently has nearly 50 patterns on Ravelry and I can probably count on one hand the number of those that I DON'T want to knit!  One thing I love about Elena's designs is that I learn something every time I knit one of her patterns.  She uses many creative construction techniques and fabulous cables to keep the interest of the knitter, although there have been times when it is a bit too much for an overtired brain.  I couldn't begin to list my favorite designs of Elena's you just need to go take a look for yourself either on Ravelry or her website.  I have been lucky enough to test knit a few of her patterns so I will just share those.
First Mate Pants
First Mate Hoodie
Undina
Summer Days
Finally for today is Alana Dakos of Never Not Knitting.  Alana has actual got a range of children's and adult designs but it was through her children's patterns that I first discovered her on Ravelry so I have popped her in this category.  We are also lucky enough to have many of Alana's pattern in stock at our LYS and the leaflets are just gorgeous and the patterns so well written and easy to follow.  So far I have only knit the Molly Beret but I am hoping to knit Chloe for Miss M in the very near future.
Chloe
Molly for a special girl
I can't talk about children's knitwear patterns without mentioning Phildar Design.  I first discovered the Phildar mags a couple of years before I discovered Ravelry and they filled my need for 'different' and modern kids patterns, I must admit I do enjoy hunting out more unique patterns sometimes rather than knitting the same thing as everyone else.  I still keep an eye on these patterns and have knit several things from them over the years with many more in the pipelines.  Here are a few of my Phildar creations.
Onesie for Miss M
Cable Jacket for Mr A
Mr A's first birthday vest
A gift
That's my roundup for today.  I'm sure that any knitter that reads this will think of someone that I have missed out today.  I can think of several others myself but simply couldn't fit everyone in.  So if you have popped by for a read then let me know who your favorite designer of children's knitwear is.